
Anyone playing games on PC knows the modern launcher headache: there are too many of them, and half the time launching a title on Steam simply spins up another secondary client before you can even play. Keeping Steam, Epic, GOG, Ubisoft Connect, and EA App all installed, updated, and running background services is a drain on system resources and an exercise in friction.
I previously gave GOG Galaxy 2.0 an honest shot, but its third-party community integrations frequently broke or refused to sync reliably.
Then I discovered Playnite—an open-source, local-first frontend that unifies modern PC storefronts and retro emulators inside a clean, community-supported dashboard. I stumbled across it after deploying RomM on my Homelab to revisit retro titles from my childhood, noticing Playnite listed as an officially supported companion frontend.
After putting it through its paces, and spending time customizing I was sold. The stability, extensibility, and plugin ecosystem convinced me to make Playnite my primary game launcher going forward.
Setup Advice
The initial setup is remarkably straightforward: install the desktop client, configure your library integrations, and trigger a sync. The vanilla interface is lightweight, stable, and completely usable out of the box. I hooked up my primary libraries—Steam, Battle.net, GOG, Epic, EA App, Amazon Games, Humble Bundle, Ubisoft, and the Xbox App—and the initial import pulled everything together smoothly.
A quick note on store syncs: Certain services like Battle.net or EA App won't always sync passively in the background. You may periodically need to launch the client or re-authenticate in Playnite to refresh the session token. This isn't a Playnite bug; it's simply a limitation of how those specific platforms handle third-party authentication.
For many users, the out-of-the-box configuration ends here and does the job well.
Customization: Making It Feel Like Home
I'm not usually one to stick with default settings. Once I browsed Playnite’s theme and addon repositories, I spent some time configuring the interface to give it the look and feel I was hoping for.
Theme and Essential Addons
There are several actively maintained desktop and fullscreen themes available. After test-driving a few, I settled on FusionX. The creator provides an excellent FusionX Recommended Settings Guide to match the screenshots, and following it makes a massive visual difference.
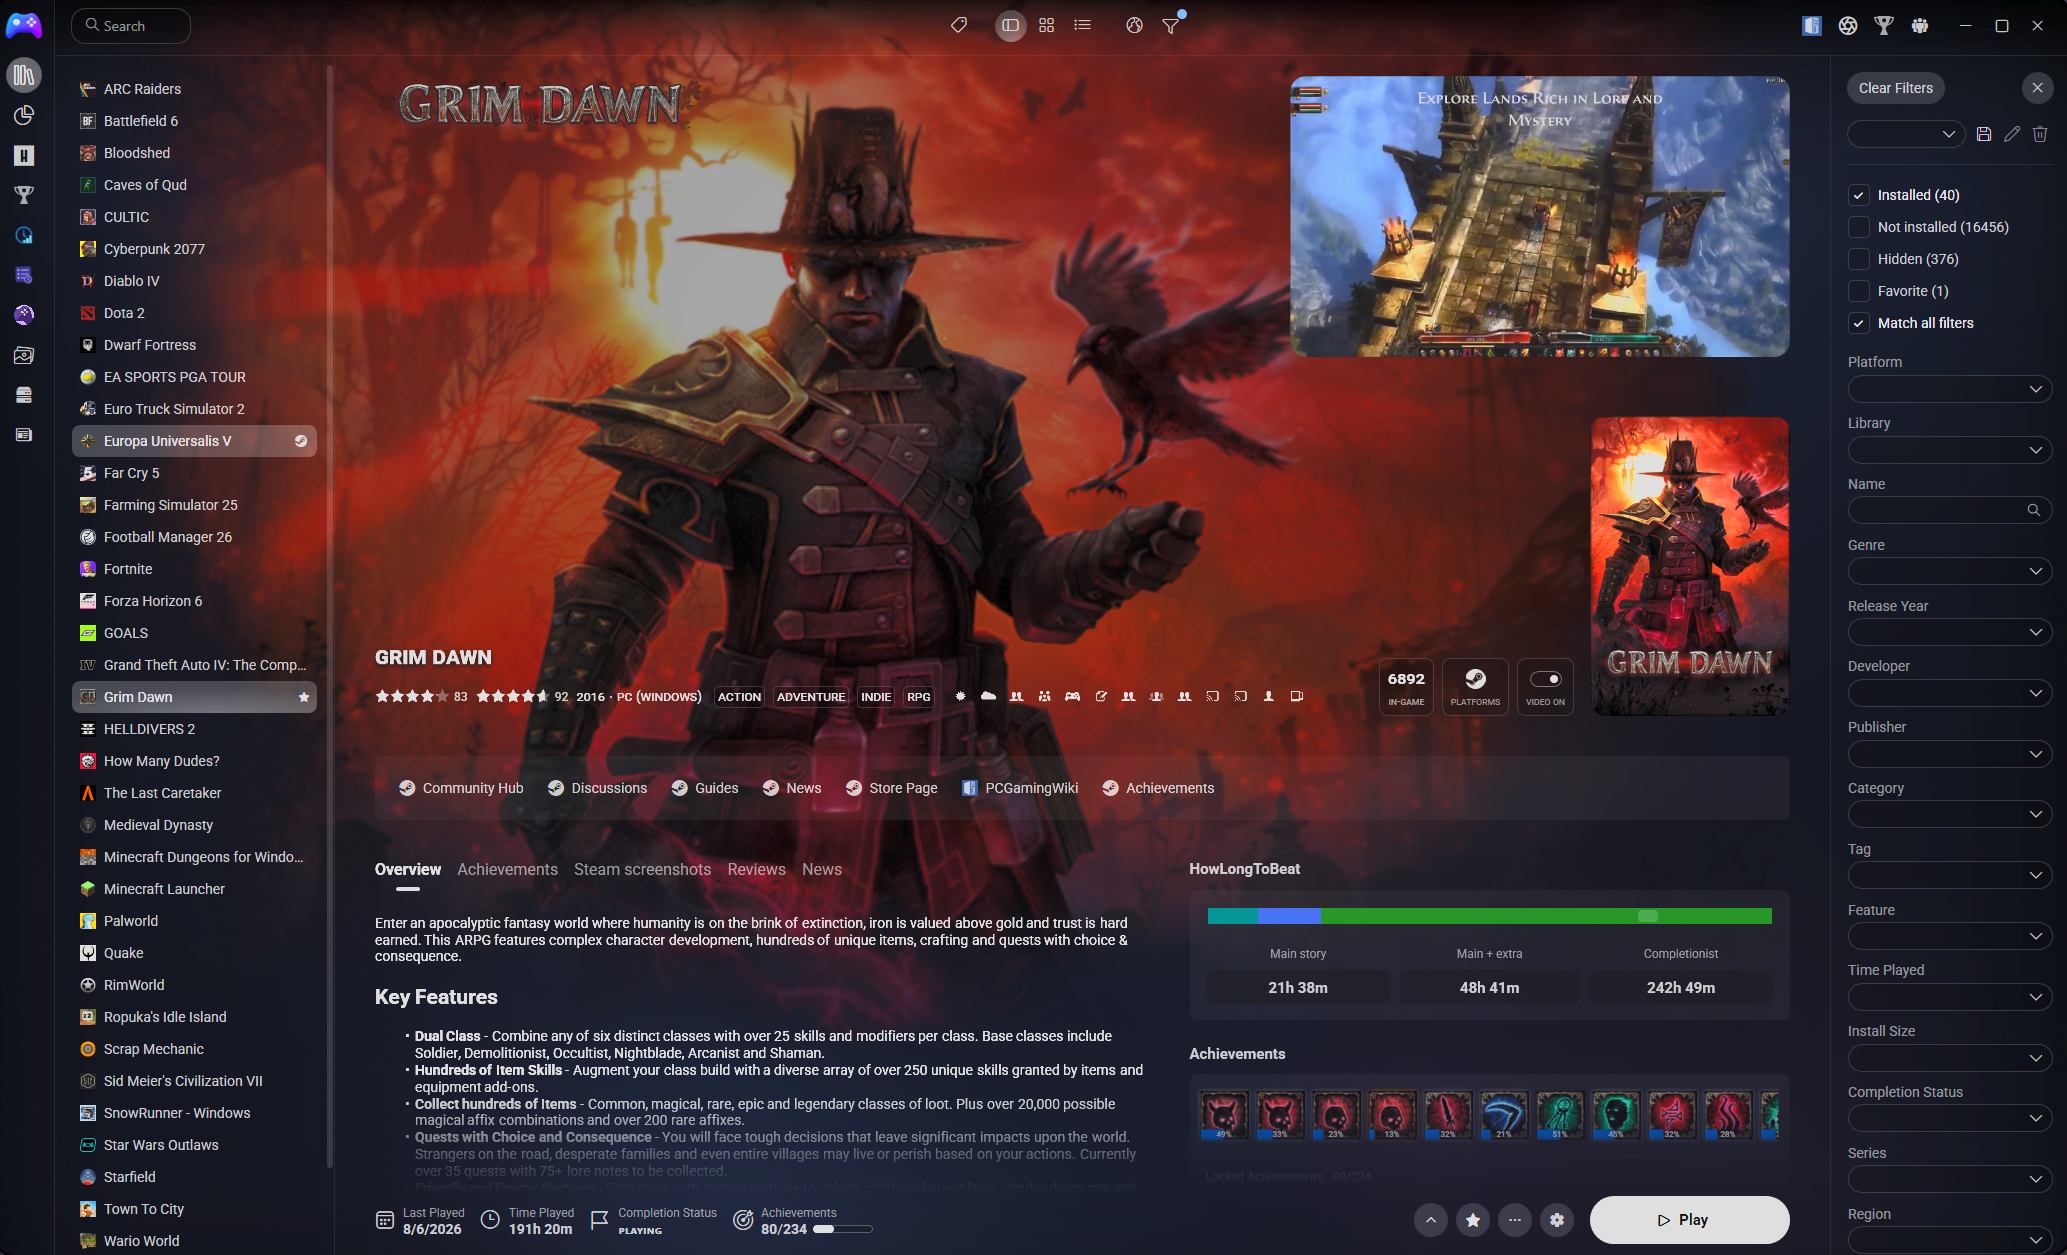
To round out the interface and surface richer game data, I installed a curated stack of extensions:
- BackgroundChanger - Customize hero backgrounds and game logos.
- DuplicateHider – Merges multi-store releases (e.g., owning the same game on both Steam and Epic) into a single, clean library card. You can also assign custom source badges.
- HowLongToBeat – Pulls estimated campaign and completionist playtimes right onto the game page.
- LibraryManagement – Adds icons to genres/platforms and allows management of metadata in the game library.
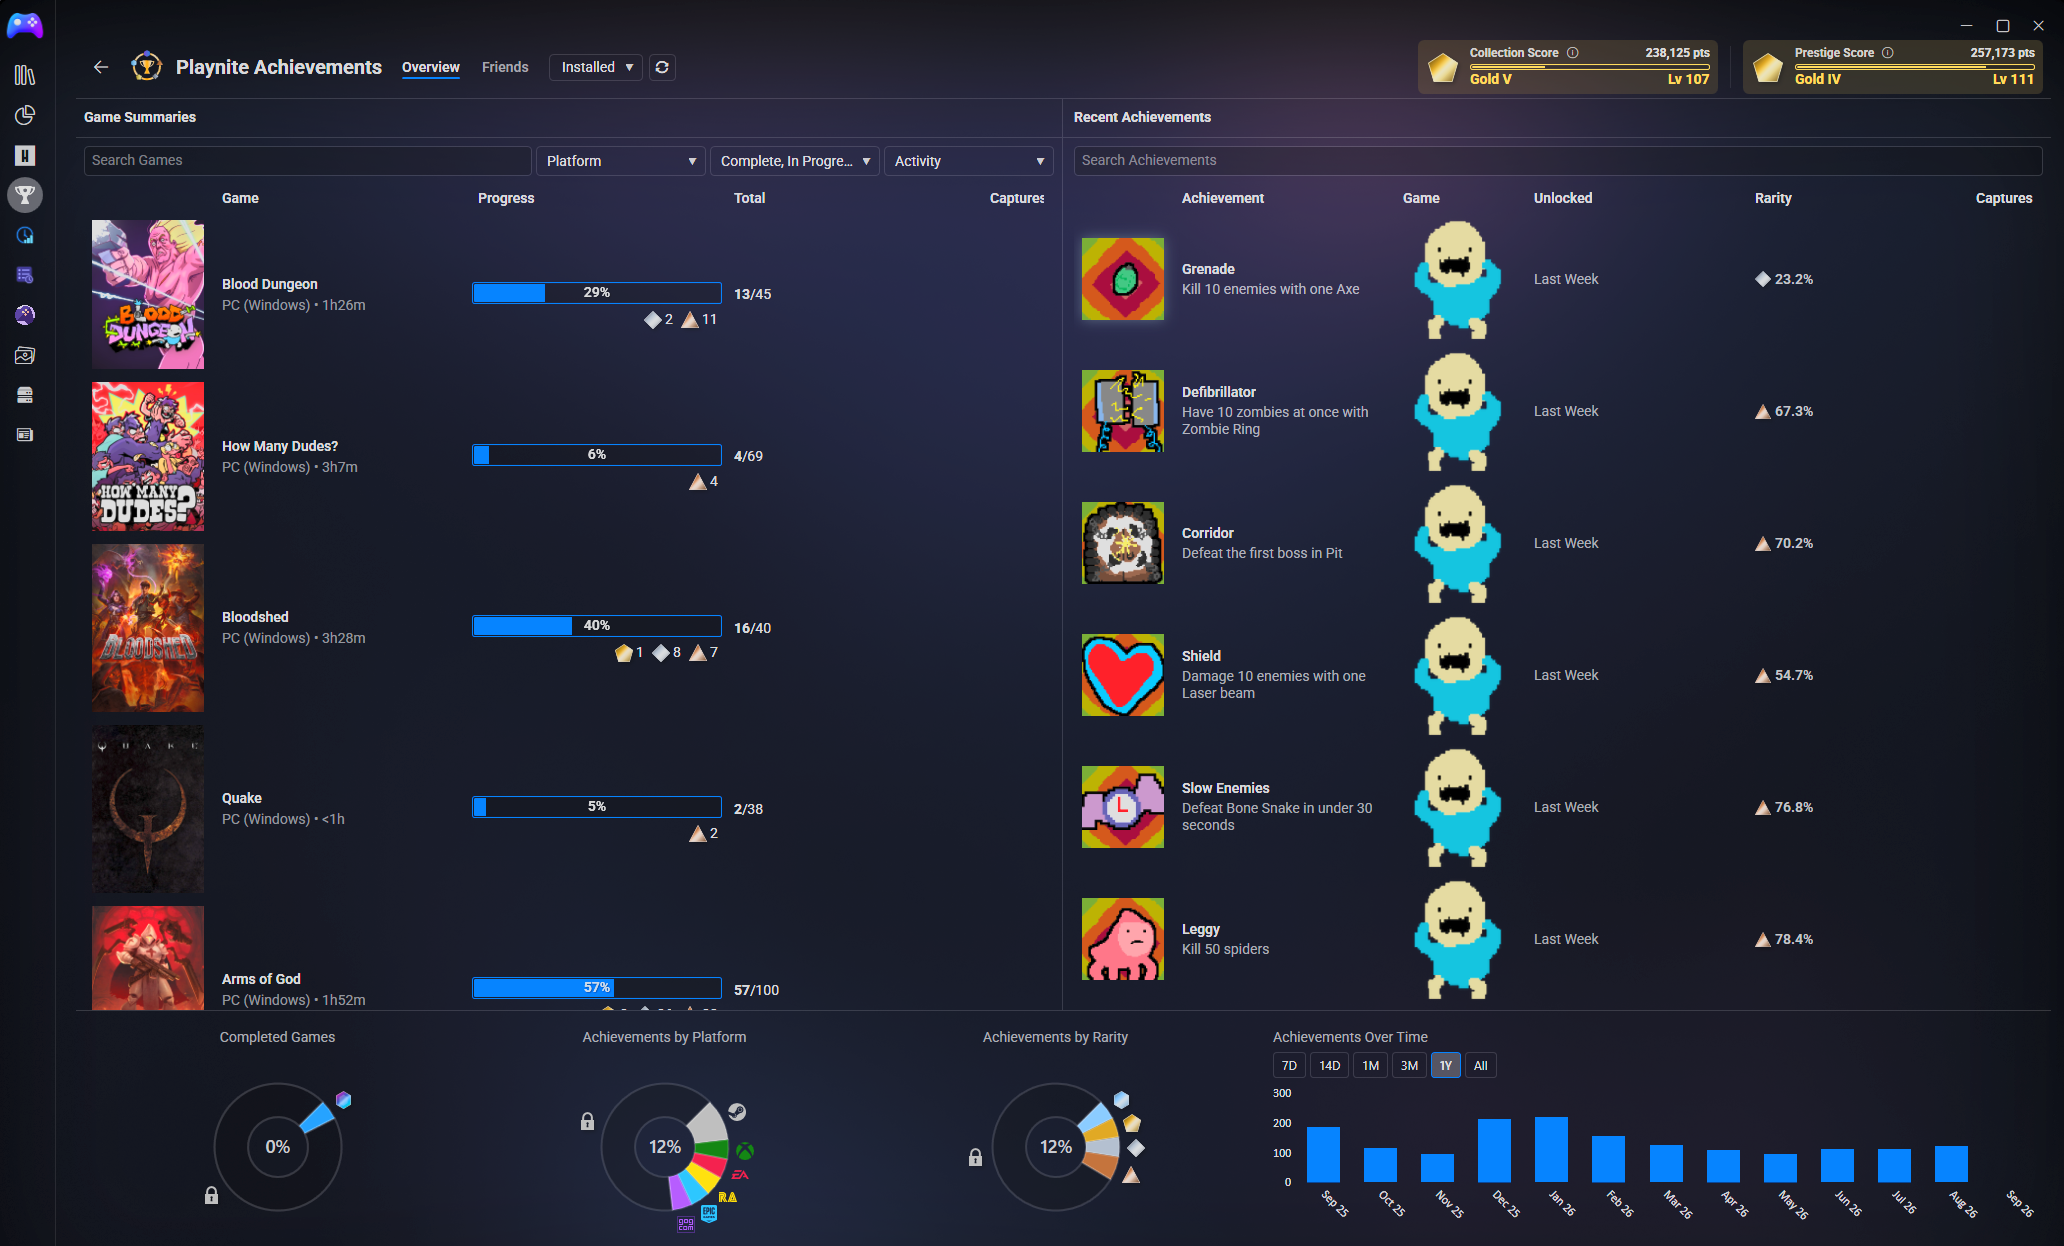
- Playnite Achievements – A clean alternative to SuccessStory for syncing and displaying achievements and trophies across launchers.
- PlayTime Insights – Local playtime tracking with heatmaps, play trends and rankings.
- Steam News and Player Viewer – Pulls official patch notes and live active player counts into supported themes.
- Steam Reviews Viewer – Displays user review summaries directly inside the game details panel.
- ThemeExtras & ThemeModifier – Under-the-hood helper addons required by modern themes to unlock custom UI layouts and styling tweaks.
Each extension comes with its own settings panel, so it’s worth taking some time to explore and tweak them to your taste.
Metadata
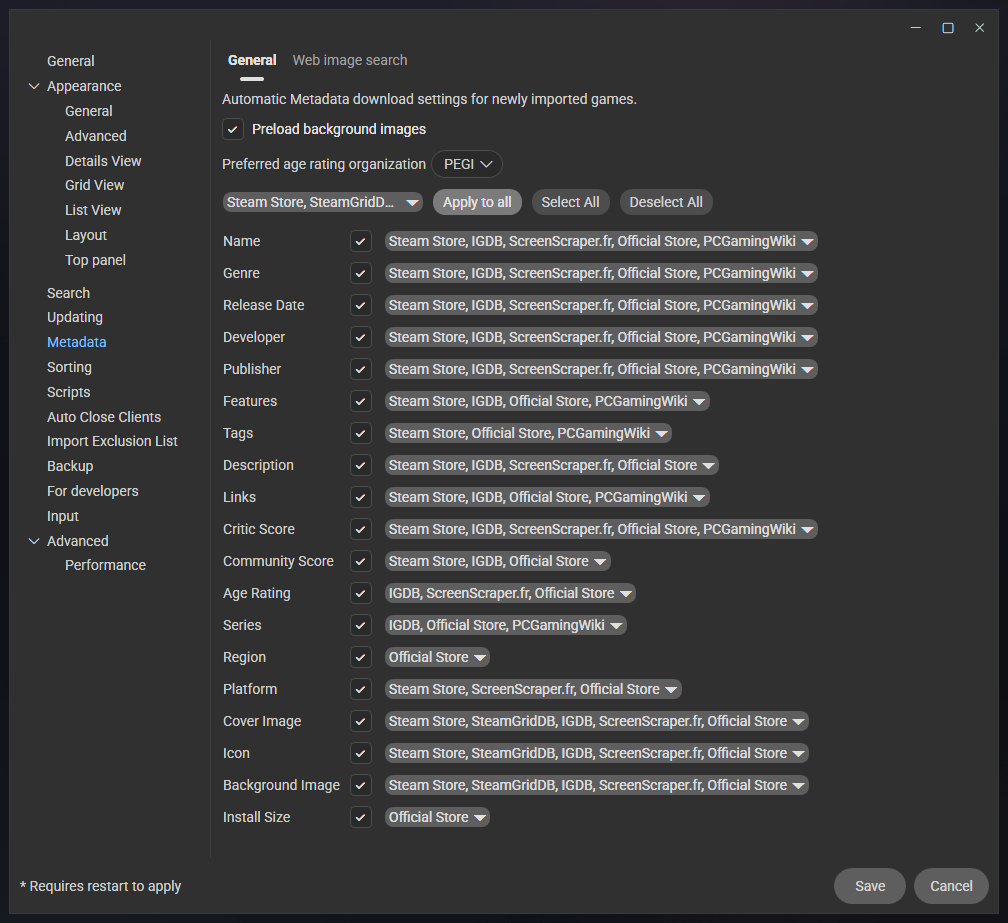
Playnite handles metadata scraping gracefully, pulling high-res banners, logos, synopsis details, and release dates from multiple providers. Different scrapers excel at different eras—especially when matching retro titles sourced from my RomM library versus modern Steam releases. You can check out this comparative breakdown of Playnite metadata sources to see how they stack up.
My personal scraper priority order is:
- Steam Store
- SteamGridDB (requires an API key)
- IGDB
- ScreenScraper.fr (requires an account)
- Official Store
- PCGamingWiki
The best part about Playnite’s metadata engine is its field-locking behavior: whenever you manually edit a title, logo, or cover art, Playnite prioritizes your local override and won't overwrite it during future automated library or metadata syncs.
Emulator & RomM Integration
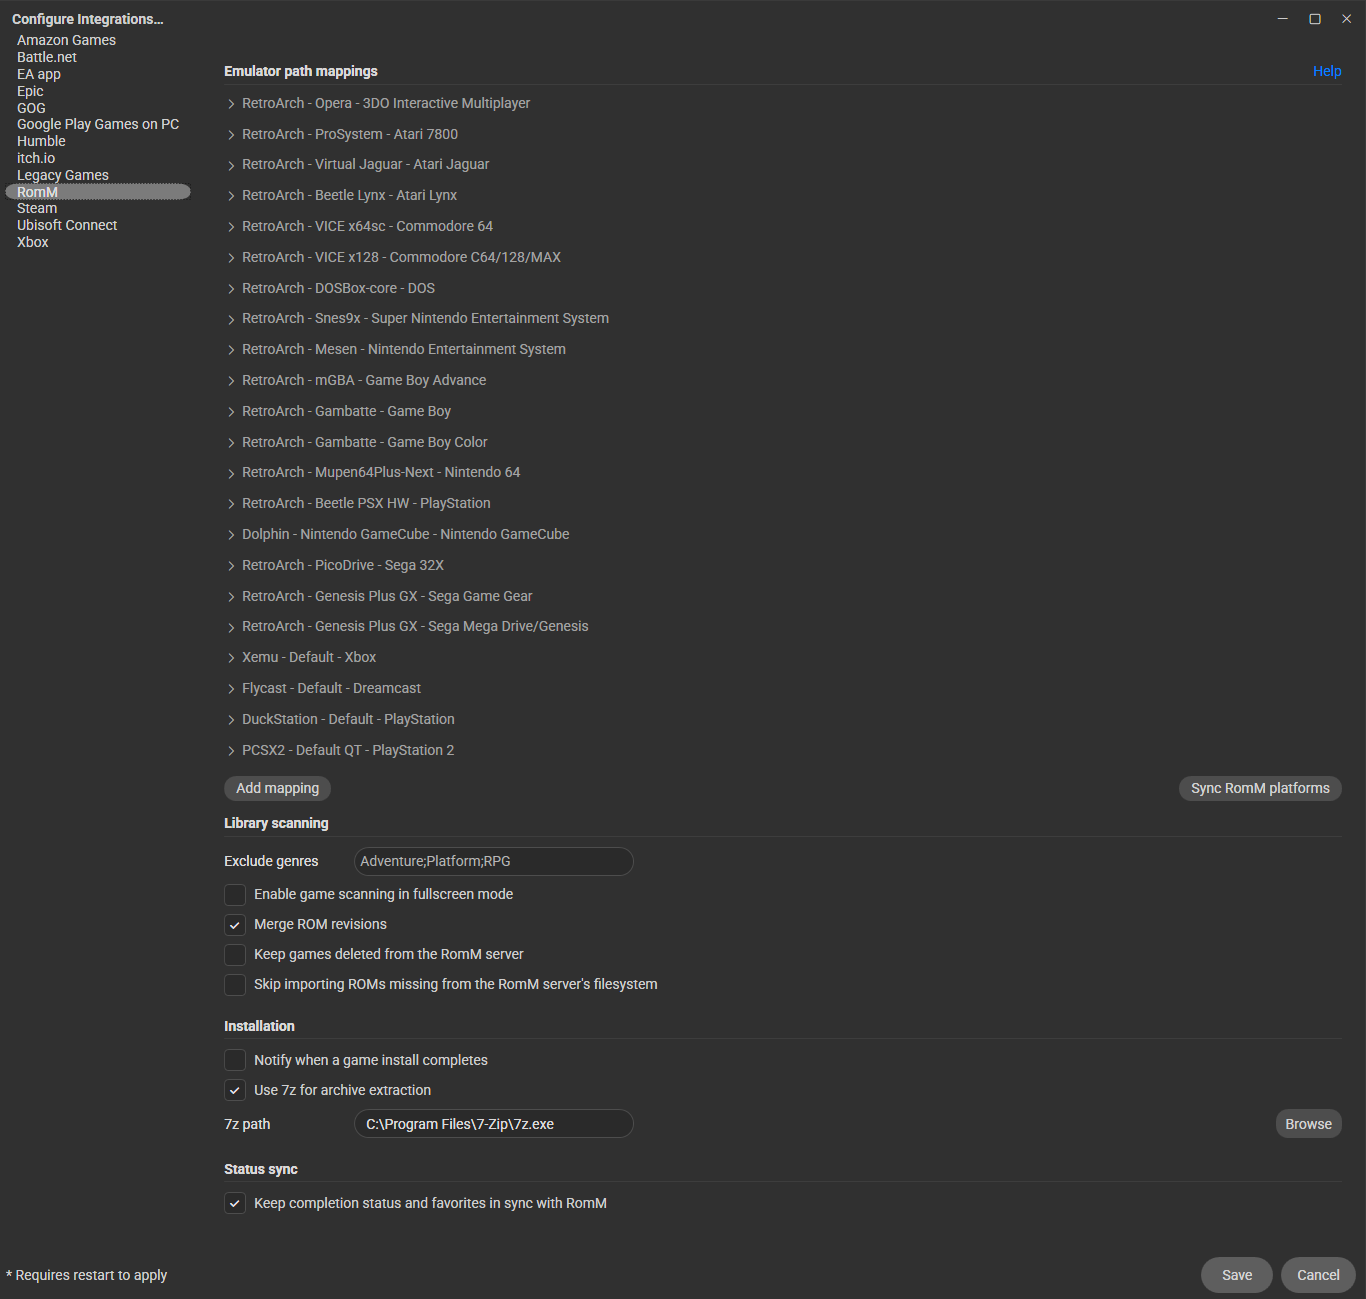
Beyond commercial launchers, Playnite's native emulator integration lets you bind specific platforms to local emulators—such as routing Super Nintendo directly through RetroArch, or original Xbox titles through Xemu.
Once configured, your RomM library sits side-by-side with your modern PC backlog, launching seamless single-click sessions via controller or mouse.
Crucial Tip for Emulator Setup: When configuring emulators in Playnite (
Library > Configure Emulators), always use Import built-in profiles rather than building manual profiles from scratch. The RomM integration looks for official internal platform IDs; manual text profiles will cause the automated play actions to fail.
Before you initiate a mass RomM import, make sure every platform is mapped to an emulator profile. If you sync beforehand without mappings in place, you’ll have to purge the imported titles from Playnite and run a fresh sync once the mappings are corrected.
For deeper technical walk-throughs, check out the RomM Playnite Plugin Documentation and the official Playnite User Manual.
Don’t Skip Backups
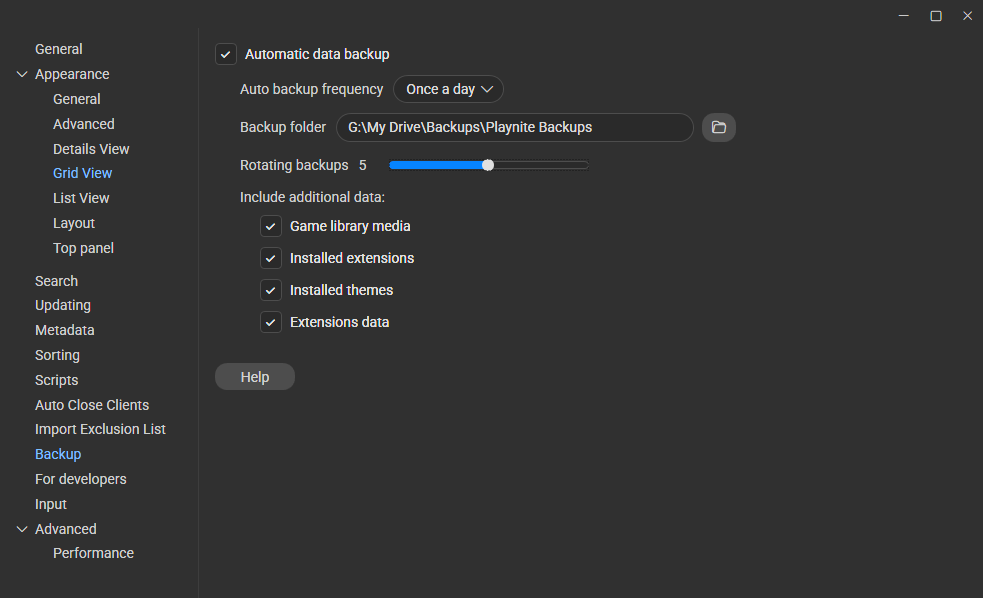
Before you wrap up your configuration, make sure you configure automated backups. Playnite features a built-in backup utility (Main Menu > Backup data...) that packages your SQLite database, configuration files, and installed addons into a single archive.
I set mine to run automatically and pointed the destination to a synced Google Drive directory, keeping the last 5 versioned snapshots. If a drive fails or a configuration corrupts, restoring the entire setup will be possible with these backup files.
A Clean Desktop Gaming Hub
Playnite has proven to be remarkably stable, mature, and light on system resources. While it won’t magically clear my backlog, it solves the fragmentation problem and turns a cluttered PC into a coherent, organized gaming hub. Having secondary store launchers silently boot minimized and automatically close after exiting a game makes the whole experience feel like a dedicated gaming rig rather than a mess of storefront windows.
If you’re running a similar setup or experimenting with your own launcher configurations, hop into the Discord and say hello. And keep an eye out—I might just be dabbling in building my own custom theme soon.